Create Presets from Effects and Transitions

Hi there! Are you looking to boost your video editing workflow and save time? In this tutorial, Jaap Boerhof, the founder and senior developer of Film Impacts, will show you the power of presets in Adobe Premiere Pro.
Presets allow you to save customized effects and transitions, so you can easily apply them to future projects without having to tweak the settings every time. Let's dive in and discover how to create presets and maximize your editing efficiency.
Customizing the Background and Adding Branding Colors
To begin, imagine you have a beautiful background and want to create some end titles while maintaining a consistent branded look. You can add a text layer, but the background may be too bright, making the text unreadable.
To solve this, we'll use the built-in Tint effect. Select the clip and navigate to the Effects Controls tab. Locate the Tint effect and adjust the mapping of black and white to match your branded colors, such as a vibrant purple.
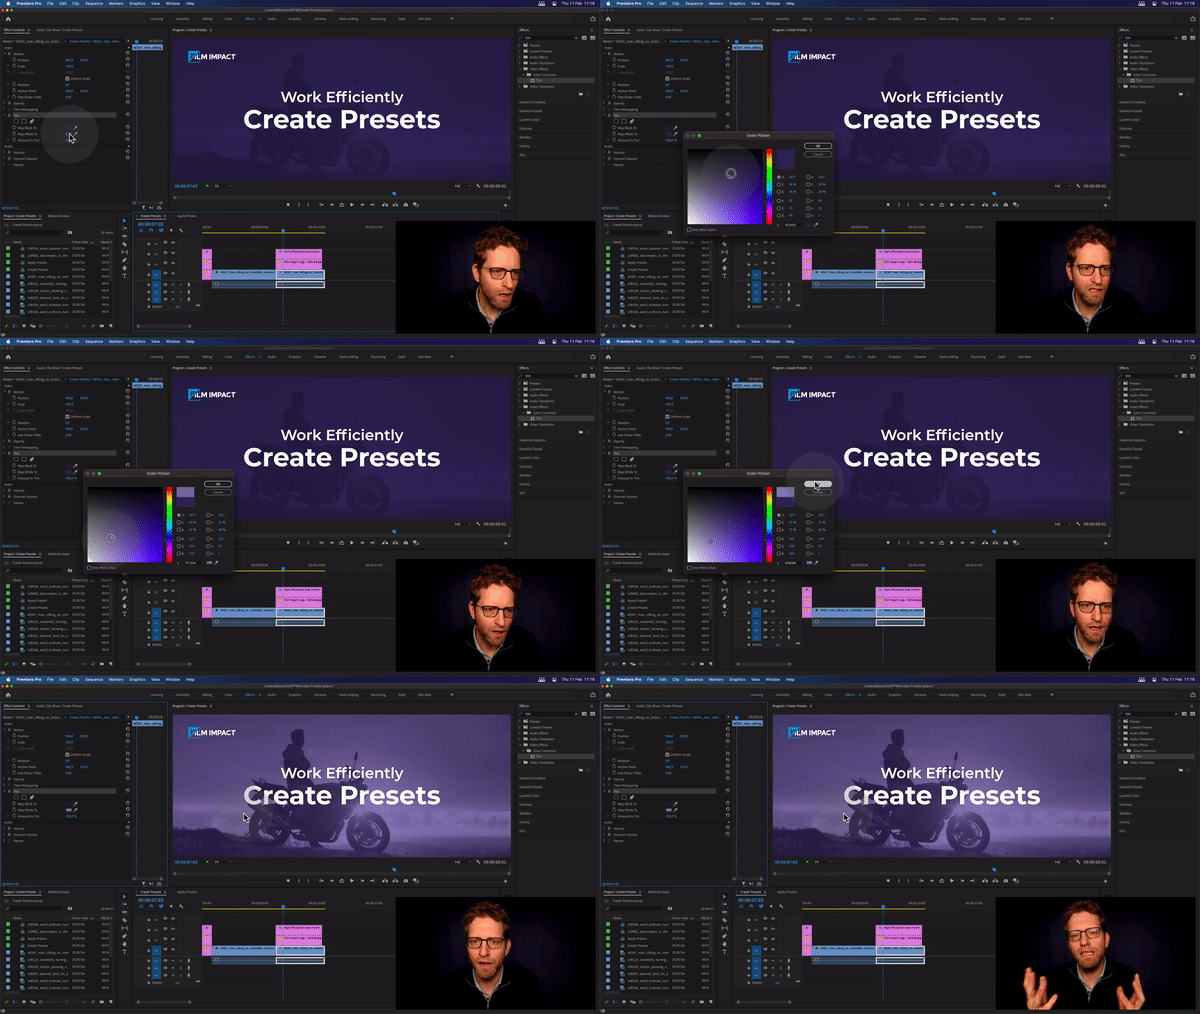
This way, you can enhance the readability of the text while preserving the background's aesthetics. It’s a sneaky little trick that every professional video editor should know!
Creating a Simple and Elegant Transition
Once you've added the text layer and customized the background using the Tint effect, it's time to introduce a seamless transition for revealing the text. So let's explore our Soft Wipe Impacts transition next. Find it in the Effects Library and apply it to the clip. Adjust the settings for a cleaner look:
- Blur Amount: Reduce the default blur level to zero or to your desired sharpness for a clear transition that doesn't distract from the text.
- Colorization: Disable or modify color effects to match your video's color scheme, ensuring a cohesive aesthetic.
- Exposure Adjustments: Remove any default exposure adjustments to maintain the clip's original lighting conditions and keep the transition simple and focused.
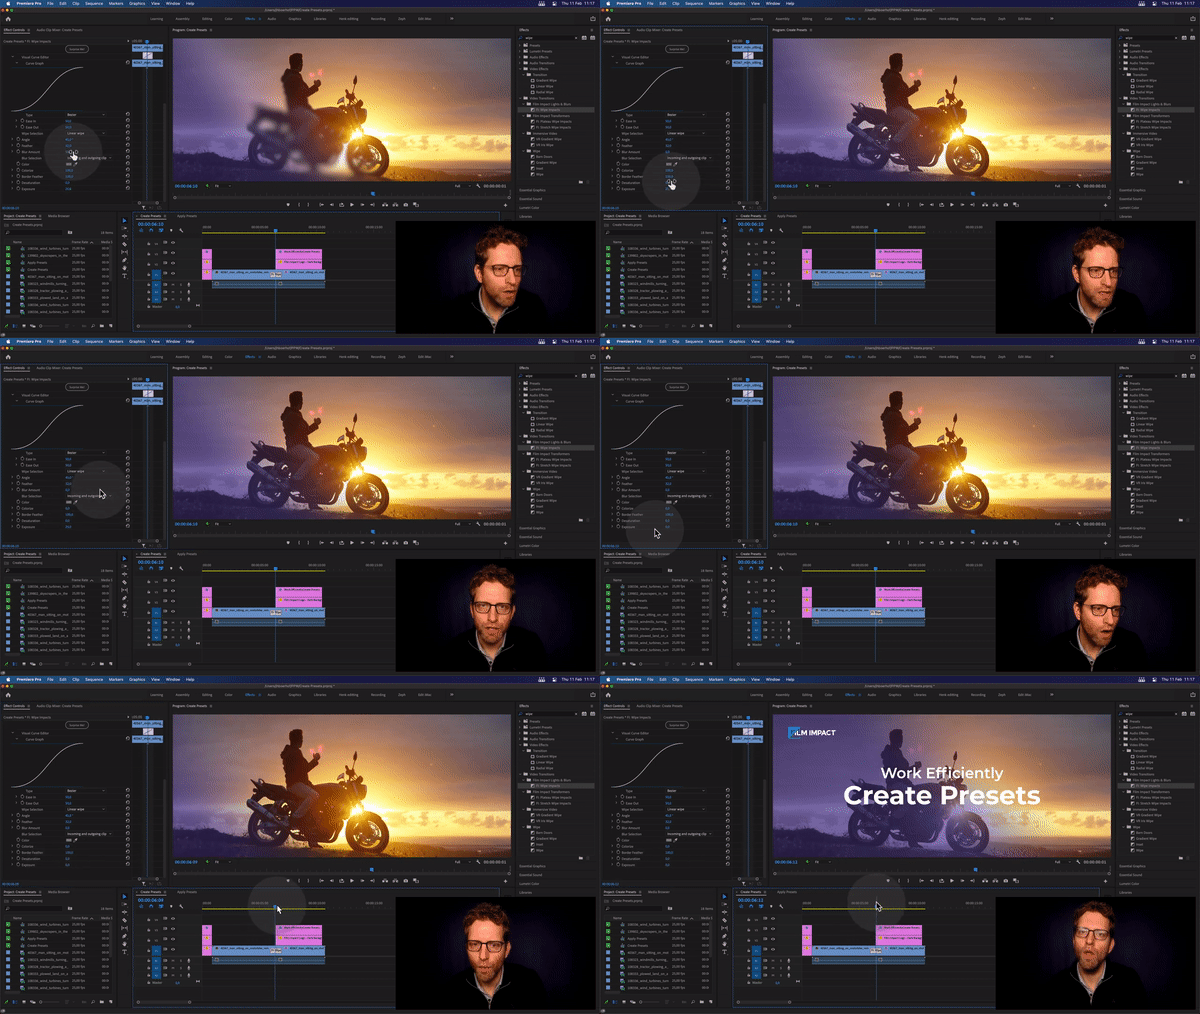
By refining the soft wipe transition through these adjustments, you'll achieve a clean and elegant effect that smoothly reveals your text. This polished transition will make your branded end titles stand out, giving your video a professional and polished appearance.
Utilizing Presets
Now, let's explore how to turn these customized effects into presets for future use. We'll start with the Tint effect. Right-click on the parameter controls of the Tint effect in the Effects Controls panel and select "Save Preset".
Give it a descriptive name like "Purple colorized background" and optionally add a brief description. By saving this preset, it will appear under the Presets section in the Effects Library, allowing you to apply it easily to future clips.
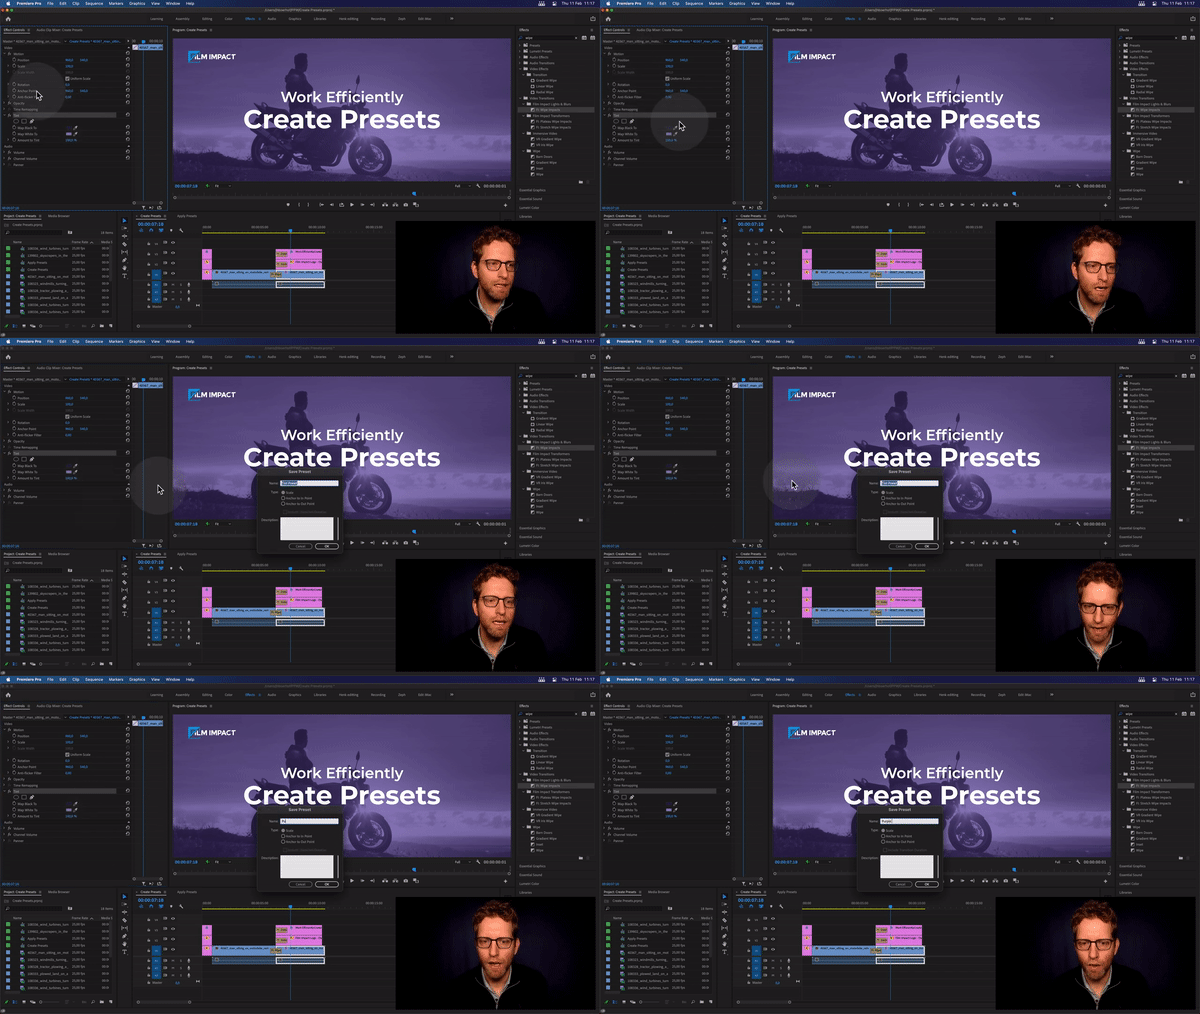
Similarly, you can create presets for video transitions. Select the soft Wipe transition, right-click in the parameter controls, and choose "Save Preset."
Name it something like "FI wipe impacts without blur or colorization" and provide a useful description. Your custom transition preset will now be accessible under the Presets section in the Effects Library.
Organizing Your Presets
When it comes to maintaining a well-structured workflow, organizing your presets is paramount. In Adobe Premiere Pro, you have the option to create a separate bin within the Effects Library specifically for your branded presets.
By naming it something like "Branded F.I. Presets" and placing your presets inside, you ensure easy access and a streamlined editing experience. This method not only keeps your presets neatly organized but also allows you to maintain a cohesive visual identity throughout your projects.
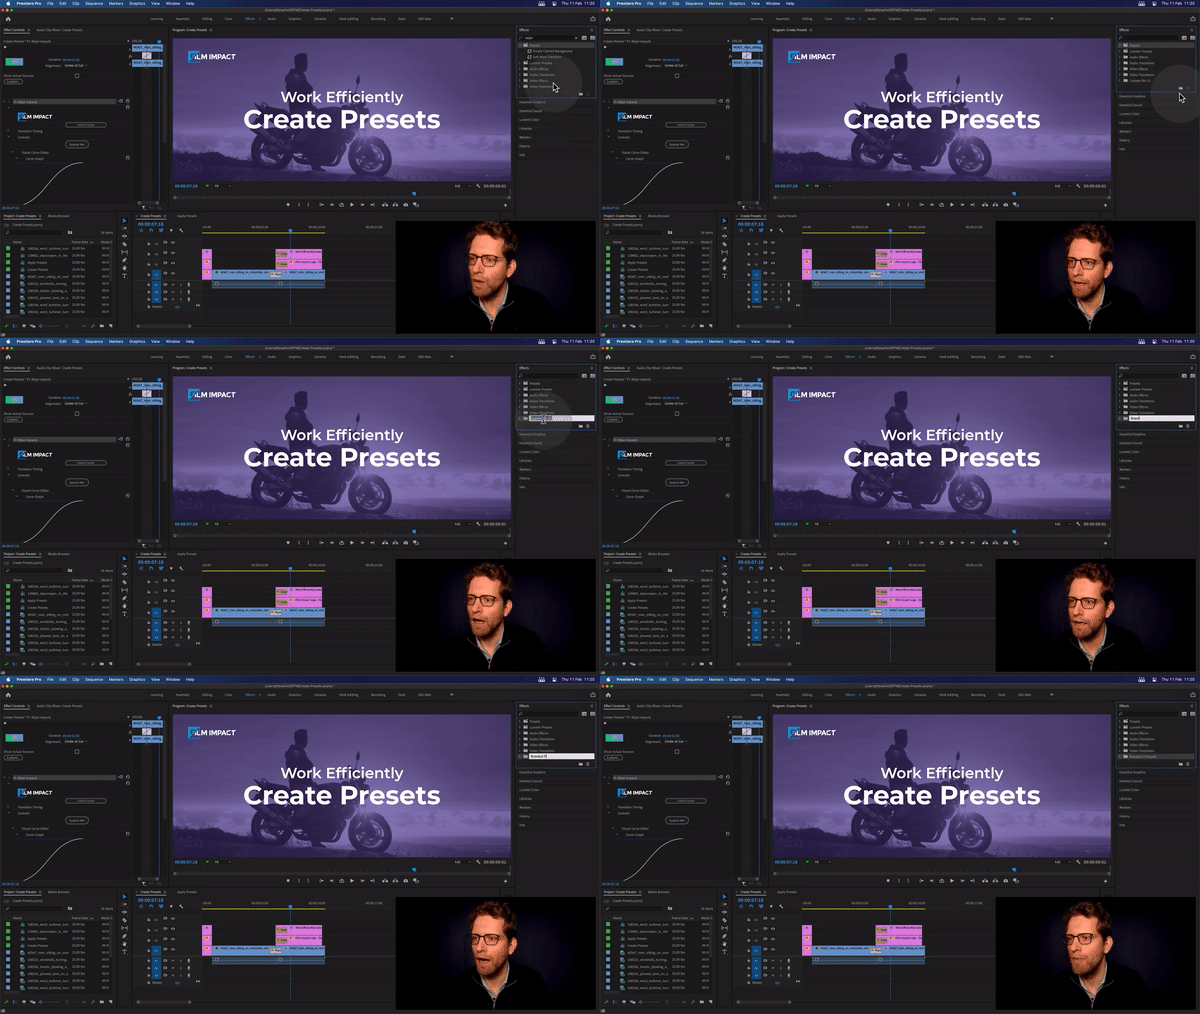
With just a few simple clicks, you can drag and drop your presets into this dedicated bin, making them available in both their original location and the branded presets bin.
Applying the Presets
Now, let's put these meticulously organized presets into action by applying them to a fresh clip. Start by adding your desired text element, and then effortlessly apply the "Purple colored background" preset.
In an instant, the text transforms, standing out clearly against the background with a touch of branded sophistication. To further enhance the visual flow, proceed by adding the preconfigured Soft Wipe Impacts preset, ensuring a seamless and elegant transition between scenes.
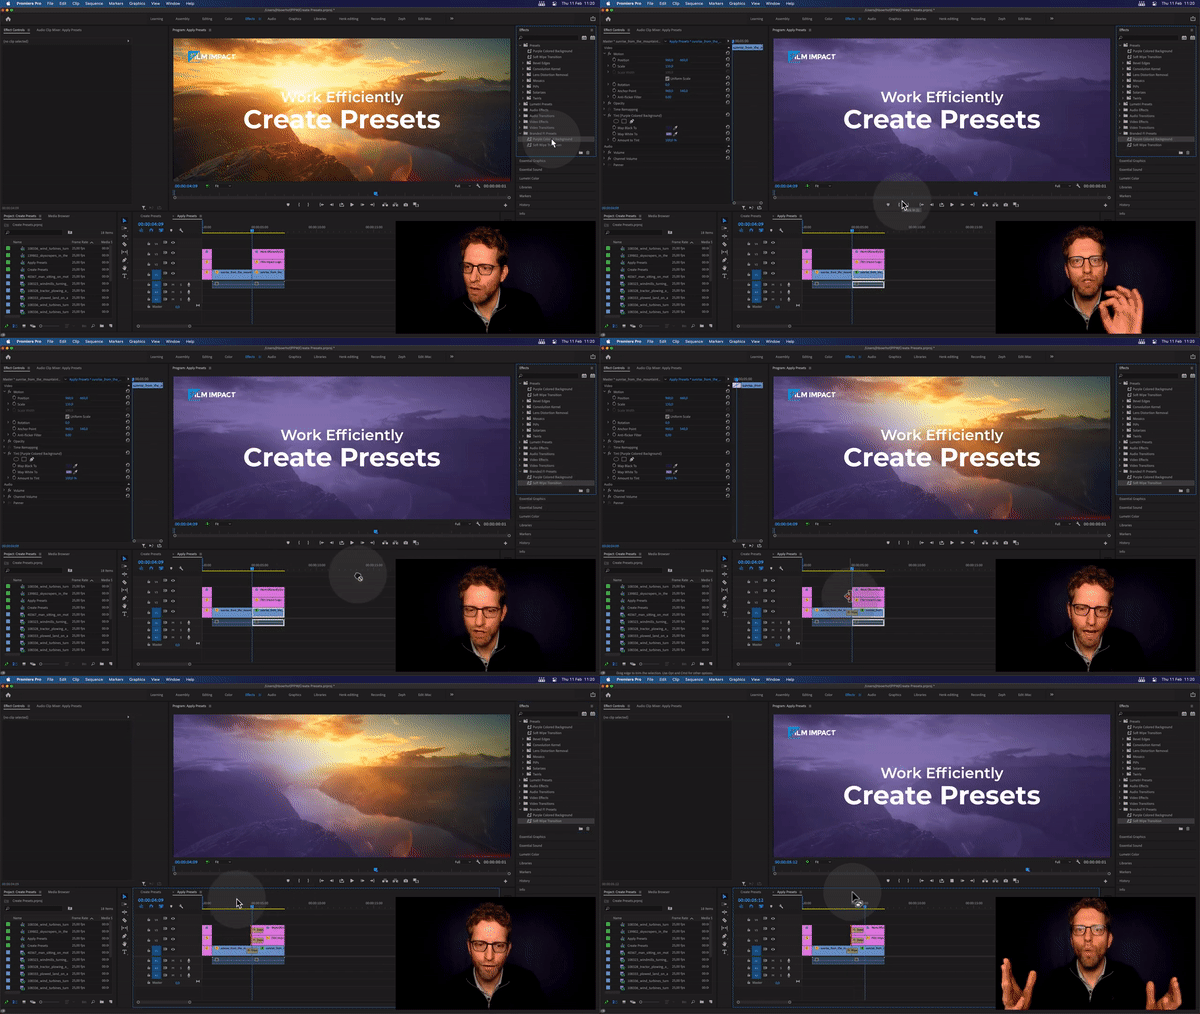
And to conclude your creation with finesse, simply apply a dissolve effect, allowing your end titles to gracefully reveal themselves. It's astonishing how all these effects and transitions can be effortlessly applied with just a few clicks, courtesy of the time-saving magic of presets.
With each preset serving as a preconfigured template of your creative vision, you can focus on refining your narrative and delivering a captivating video without being bogged down by manual adjustments.
To Sum it All Up
By harnessing the potential of presets in Adobe Premiere Pro, you've unlocked a valuable tool to enhance your editing workflow. Creating presets from customized effects and transitions allows you to quickly apply them to future projects without wasting time adjusting settings repeatedly.
Now, you can streamline your editing process, maintain a consistent branded look, and bring your creative vision to life with ease. Enjoy the efficiency and creative freedom that presets offer.
Thanks for watching, stay tuned for more exciting tutorials. Happy editing!
Plugins used
Product compatibility


