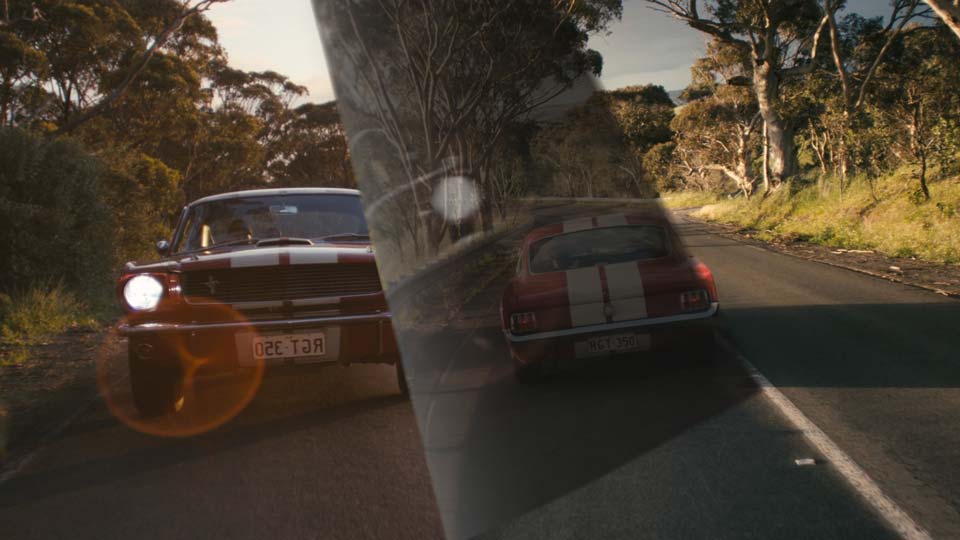
Create Presets in Adobe Premiere
Many Premiere Pro effects are adjustable. You can often adjust things like the direction, blur amount, colors, etc. Being able to tweak each effect makes an effective way more versatile and usable for various purposes. For example: Now you can emphasize a particular brand color or differentiate between a flash forward or a flash backward.
What if you want to re-use a particular setting of an effect? Grab a pen and paper? Remember the settings? Copy and Paste this effect? There is a more convenient and effective way: Create or import presets into Premiere Pro.
Learn how easy it is to create, apply, and manage custom presets inside Premiere Pro.
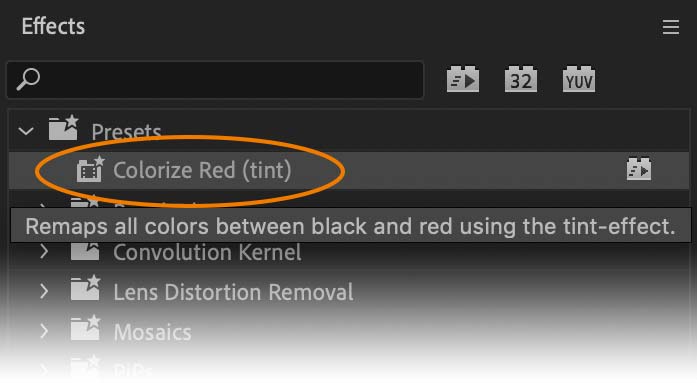
How to build presets from effects and transitions
Create Video Presets for Premiere Pro
Before we can create a preset in Premiere Pro, you'll need the actual effect that you want to create a preset for. In this example, we'll use the built-in 'Tint' effect from the 'Color Correction' tab under 'Video Effects'
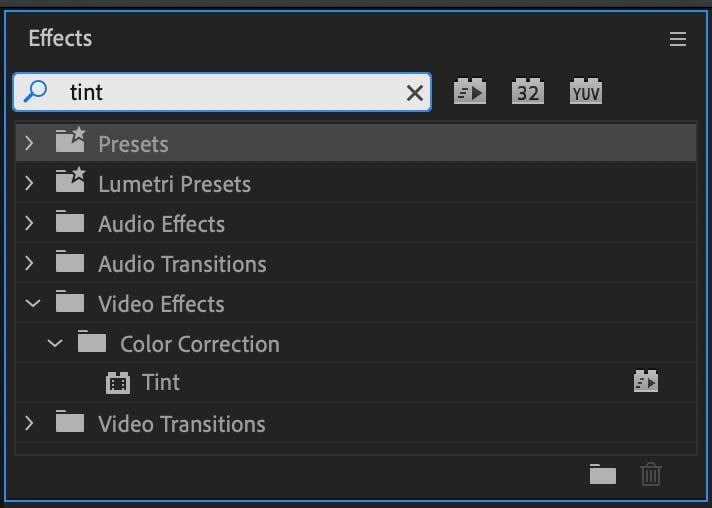
Step 1: Apply and modify your video effect
Let's apply and modify the Tint Effect in three simple steps:
- Drag the 'Tint' effect from the Effect Library onto a clip in your sequence
- Now select the clip by clicking the clip in your sequence.
- Then press Shift+5 to open up the Effects Controls Tab.
Step 3 will open up the Effects Controls for all the effects applied to this particular clip. You'll find the 'tint' effect listed.
Change the color' Map White To' to Red. See how this change affects the entire clip.
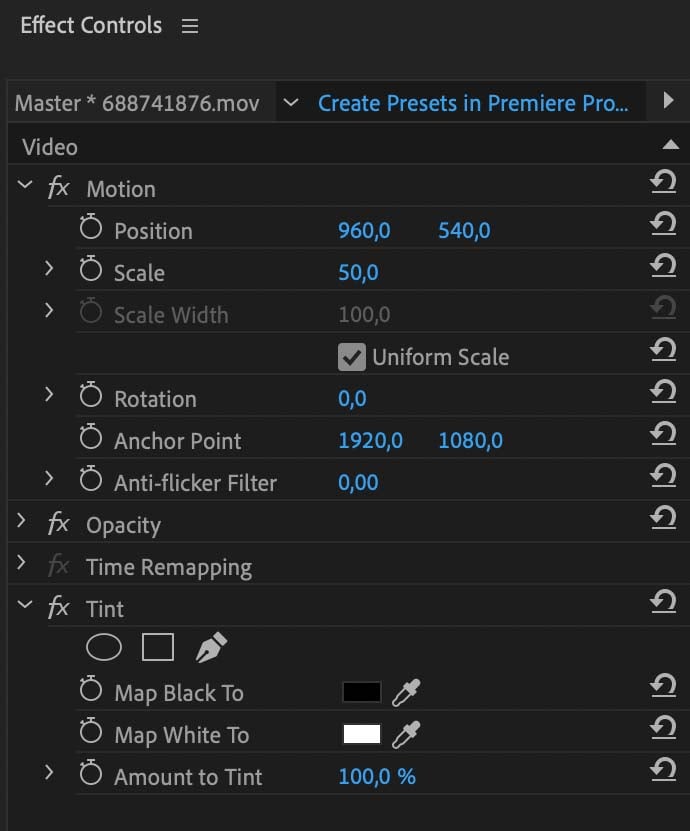

Step 2: Create Effects Presets
The next step is to create the preset from the effect that we've just applied. Follow the following three easy steps:
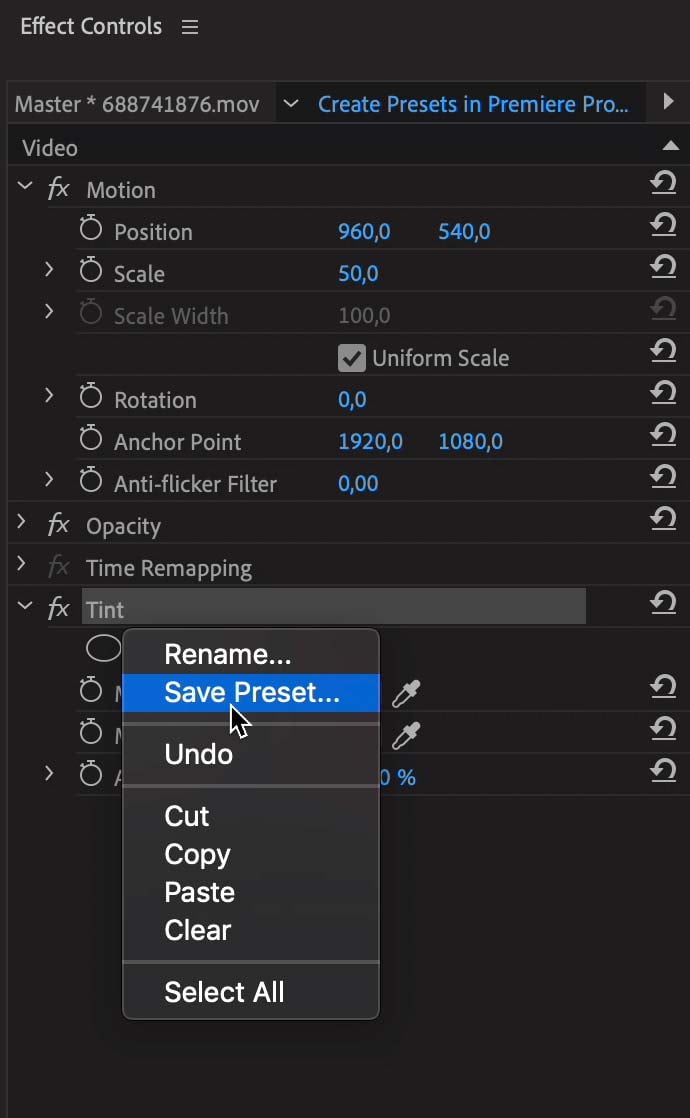
- Right-click the effect in the Effects Controls Browser
- Select 'Save Preset…'
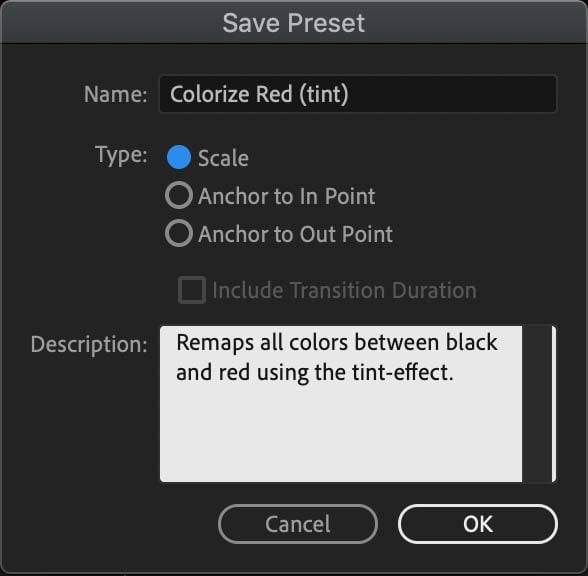
- Give the Preset a name: "Colorize Red (tint)"
- Leave the type to 'Scale' (*)
- Optionally Enter a description: "Remaps all colors between black and red using the tint-effect."
(*) Only applies when you are using keyframes in this particular effect. Preset options explained below.
Where to find Presets in Premiere Pro?
All presets are stored in the Effect library under 'Presets'. You can manage folders, and rename presets quickly. This is useful when the number of presets ramp up. Keeping the presets folder structured will help you to find the presets more quickly.

How to add presets in Premiere Pro
To apply the preset that we've just created, all we need to do is navigate to the Premiere Effects Library. Look for the 'Colorize Red (tint)' preset. And drag this preset to another clip. Now isn't that simple? You can repeat this process over and over again. That will save you a whole lot of time tweaking and adjusting each effect over and over again.
Create Premiere Pro Transition Presets
Creating presets for transitions is just as easy as creating presets for video effects.
For this example, we'll have the Page Peel Impacts applied between two clips.
This creates a Peel-on video effect.
This is how you can create a reversed Page Peel video effect.
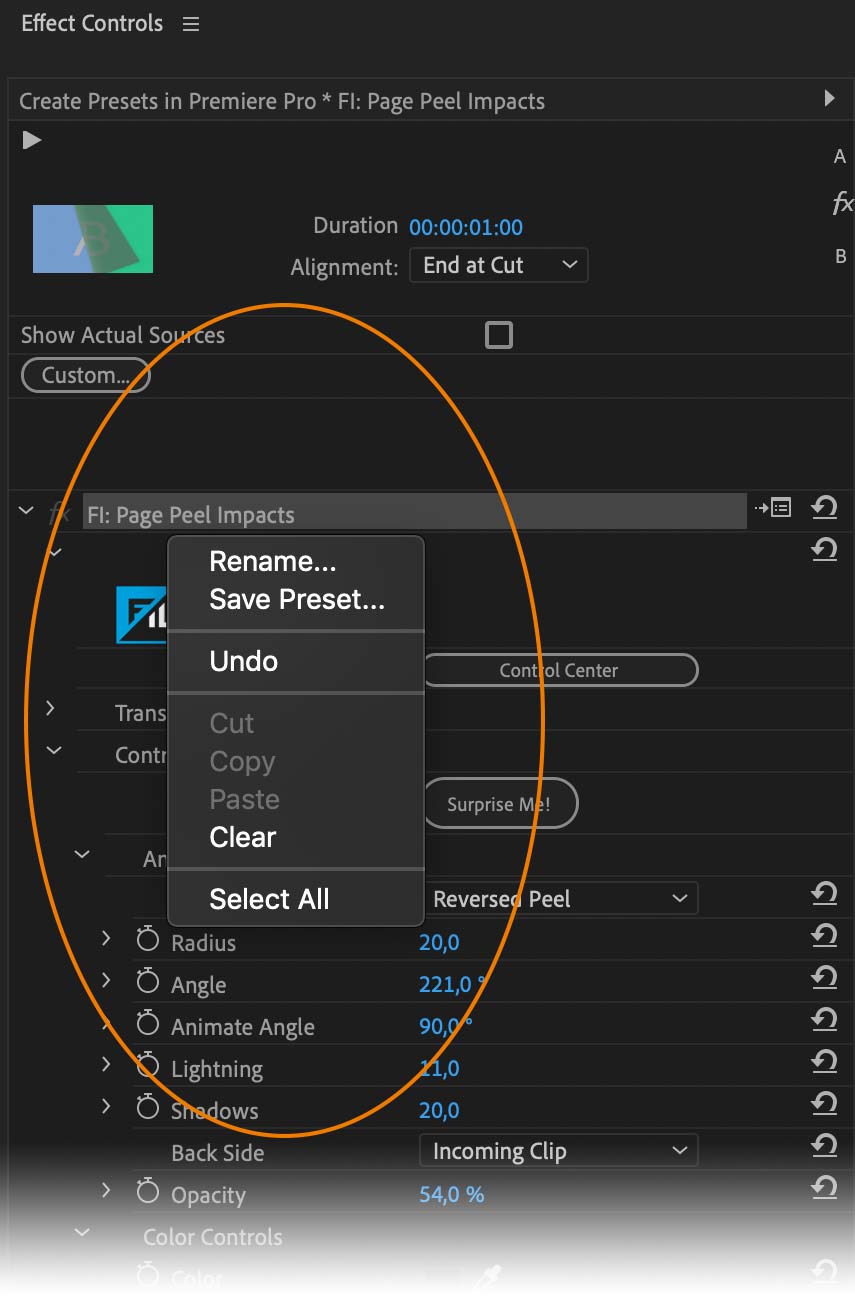
- Click the Page Peel Impacts transition in your sequence.
- Go to the Effects Controls Tab (Shift+5 to get there quickly)
- Change the Mode to Reversed Peel
- Right Click the Page Peel Impacts and select 'Save Preset…'
Presets type options explained
When you are using keyframes to animate the parameters of an effect, you'll want to know how Premiere Pro will deal with them. Since keyframes are locked to a certain time, you want to tell Premiere where the keyframes will be applied — Especially when this preset gets applied to clips with another length. You'll find three options:
- Scale
- Anchor to In-Point
- Anchor to Out-Point
Let's explain each of the types one by one.
Scale Type Option
Places the keyframes depending on the relative length of the clip.
Example:
Take a clip of 60 frames. A keyframe at frame 6 of this clip will be placed at a 10% duration offset of the start of the entire clip. When this preset gets applied to a clip of 90 frames long, the keyframe will be placed at frame 9.
Anchor to In-Point Type Option
Places the keyframes depending on the in-point of the clip.
Example:
Take a clip of 60 frames with a keyframe at frame 6. When this preset gets applied to a clip of 90 frames long, the keyframe will be placed at frame 6.
Anchor to Out-Point Type Option
Place the keyframes depending on the out-point of the clip.
Example:
Take a clip of 60 frames with a keyframe at frame 6. When this preset gets applied to a clip of 90 frames long, the keyframe will be placed at frame 36. Why? The initial clip was 60 frames long. The keyframes position was 60-54=9. The new keyframe position with a clip of 90 frames is 90-54 = 36.
Get free transition presets for Premiere
Need free Premiere Pro presets? Grab our full library of video transitions for Premiere Pro. Explore the best video effects for Premiere Pro. Simply create transition presets from our premium pack of video transitions.
- Take your favorite video transition.
- Tweak and adjust the effect.
- Create a preset from this transition.
Now you're ready to apply your favorite transition with your personal settings to your video production. Simply drag and drop to apply your preset to your edits. Discover our video transitions free for 30 days with the button below.
We wish you all the best in creating high-quality video content!
30-Days Free Unrestricted Access — Enjoy!
And Get 4 Premium Video Transitions as a FREE Bonus!

