Mastering Video Transitions in Premiere Pro: a Comprehensive Guide

Hello there, passionate video editor! In this tutorial we will be sharing valuable insights on how to effectively apply video transitions with ease in Premiere Pro.
As video editors, we face the challenge of finding the perfect balance between efficiency and creativity. One pain point we often encounter is spending hours adjusting transitions, only to be left unsatisfied with the results.
That's where this guide comes in - to equip you with the knowledge and tools to effortlessly apply captivating video transitions, saving you time and unleashing your creative potential.
We'll cover essential aspects such as transition timing, length, common issues you may encounter, and even delve into the exciting world of tweaking and modifying video transitions.
And now, let's dive in and revolutionize your video editing workflow!
Apply Video Transitions in Premiere Pro
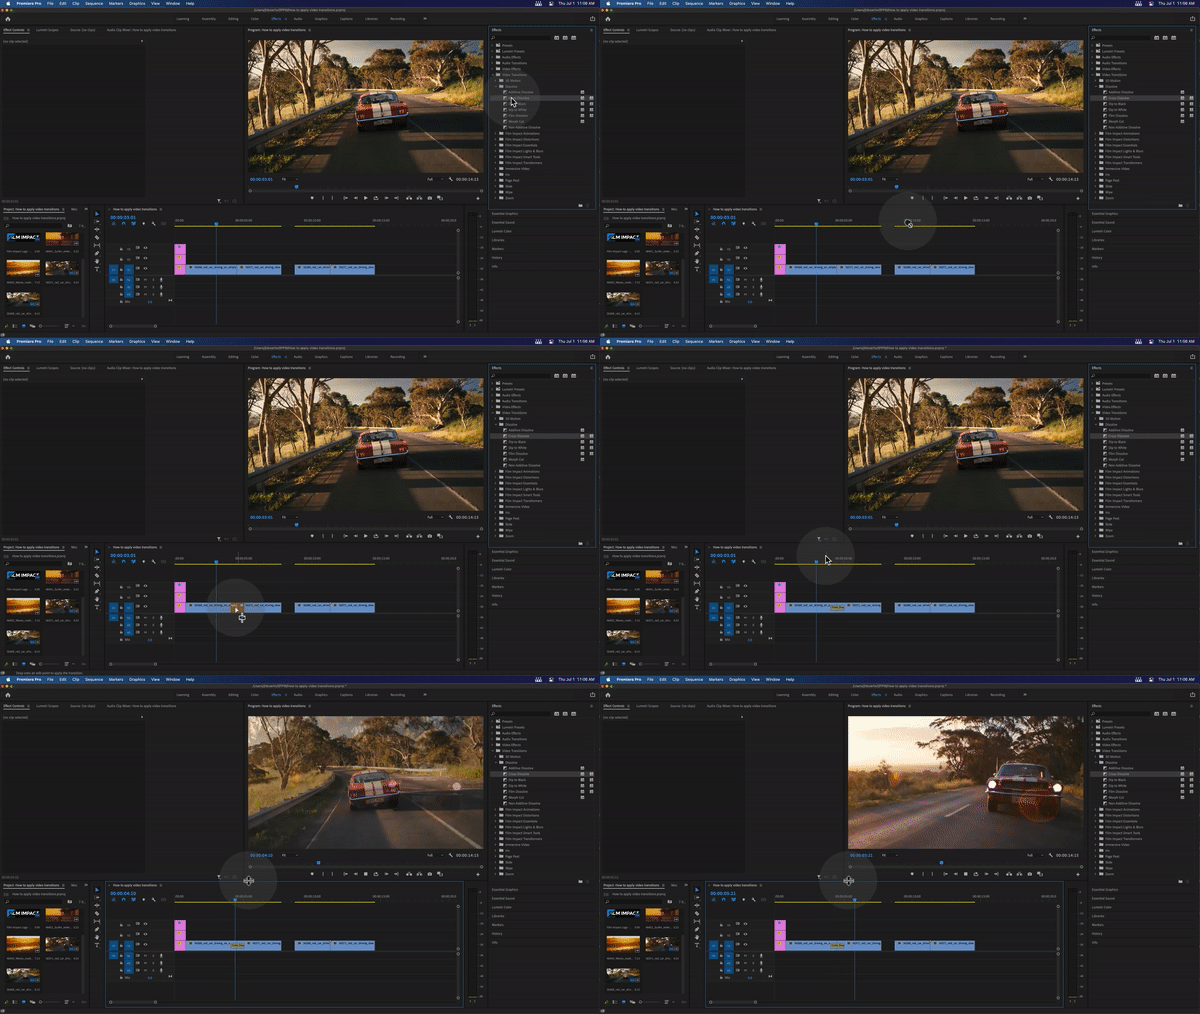
To begin, let's explore the process of applying video transitions in Premiere Pro. In the Effects Workspace, optimized for adding effects and transitions, you'll find the Effects Library.
Within the Video Transitions section, you'll discover a comprehensive list of installed video transitions. For this tutorial, I'll be using the popular Cross Dissolve transition.
Applying the Cross Dissolve transition is as simple as a drag and drop onto the desired cut. Instantly, you'll witness a beautiful fade from one clip to another. By default, the Cross Dissolve transition has a one-second duration.

However, adjusting its length is a breeze. Clicking on the transition enables you to drag the handles and extend or shorten its duration. Additionally, you can double-click the transition to set a precise duration using hours, minutes, seconds, and frames.
Addressing Common Issues
When it comes to setting video transition durations, it's crucial to be aware of potential problems that may arise. One common issue occurs when the duration exceeds the available media, resulting in repeated frames with diagonal lines appearing in the video.
To prevent this hiccup and ensure a smooth transition, it's highly recommended to decrease the transition length. Watch the video above, to see how Jaap gracefully handles the problem at hand.
By doing so, you can maintain a seamless flow between scenes, ultimately enhancing the overall viewer experience. This attention to detail not only eliminates distractions but also ensures the highest quality output.
Tweaking and Modifying Video Transitions
Now, let's venture into the exciting realm of tweaking and modifying video transitions. While the built-in Cross Dissolve transition in Premiere Pro provides a basic fade effect, Film Impact offers a range of premium tools that expand your creative possibilities and allow for more customization.
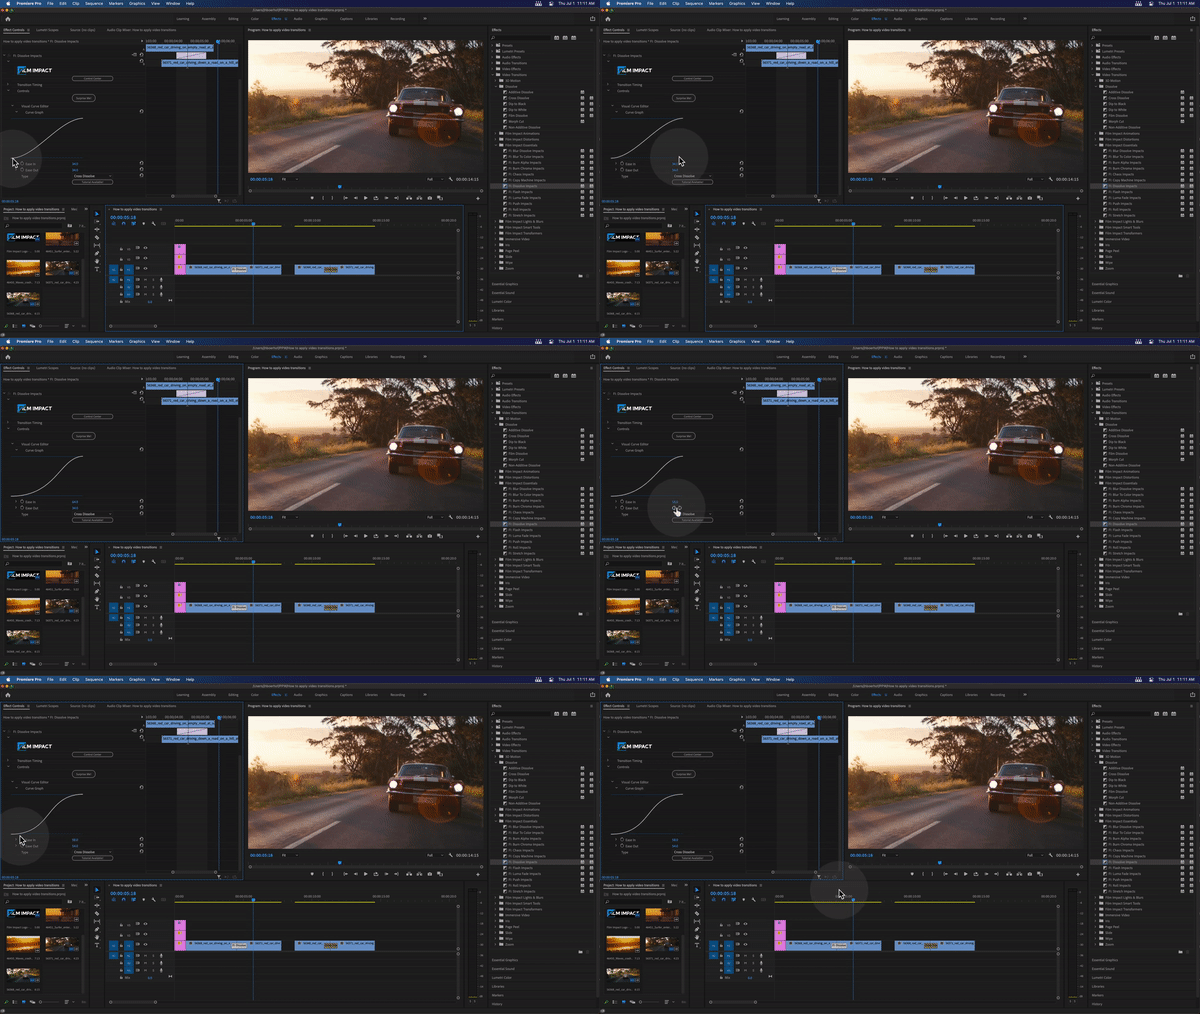
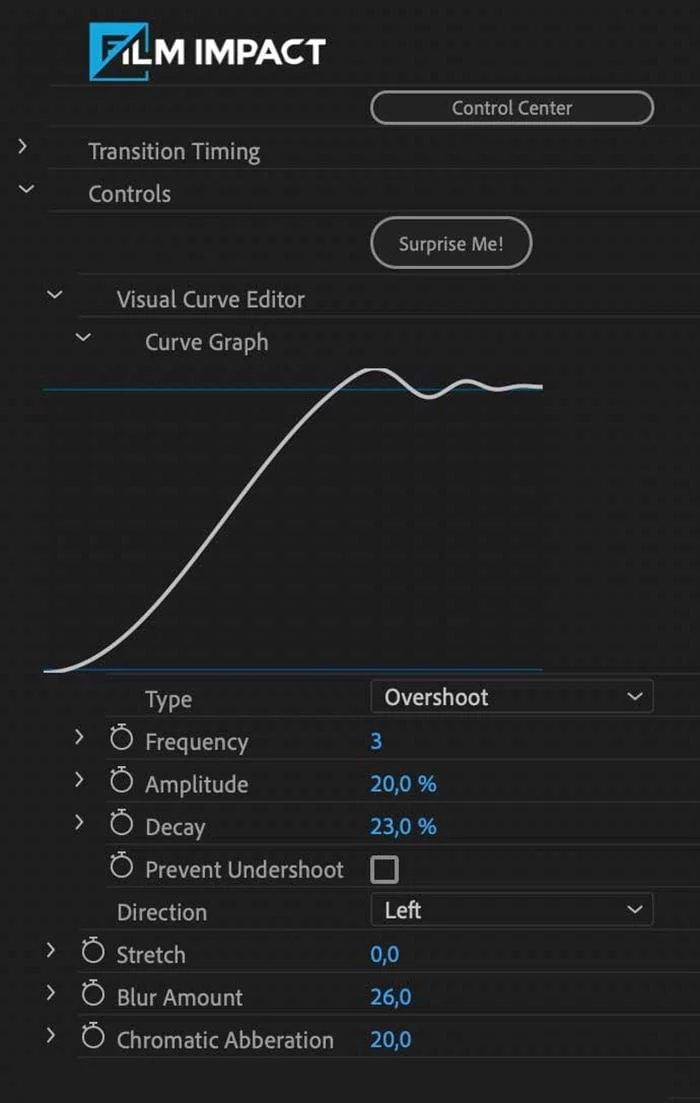
One such tool is the Dissolve Impacts, which you can get for free - forever when you start your 30-days free trial! With this tool, you'll discover a whole new level of control over your transitions. The curve graph feature gives you precise control over how the fade moves from clip A to clip B.
By adjusting the curve, you can create seamless and visually captivating transitions that perfectly match your desired style and pacing.

But that's not all! Another remarkable free tool we offer is the Push Impacts, available within the Slide section of Film Impacts tools and plugins. Push Impacts adds a dynamic element to your transitions, allowing you to create captivating visual movements.
With customizable parameters like direction, you have the freedom to experiment and create push transitions that add depth and intrigue to your videos. Whether you want a push from top to bottom or a horizontal push from right to left, the possibilities are endless!
These additional tools from Film Impact empower you to go beyond the limitations of the built-in transitions in Premiere Pro. And with our powerful SmartVideo Editing™ Technology, you can truly transform your video transitions and elevate the overall impact of your projects!
Comparing Built-in and Film Impact Transitions
Why Choose Film Impact Transitions over Premiere Pro Built-in Ones?
Film Impact transitions are superior to built-in options because they use our innovative SmartVideo Editing™ Technology! This technology gives you more control, customization, and creativity with your transitions.
Some of the features that make Film Impact transitions stand out are:
- Visual Curve Editor: You can adjust advanced motion curves without keyframes or math.
- The Surprise Me Button!: You can explore the full potential of each transition with one click.
- Transformation Controls: You can guide your audience’s attention and focus with position, rotation, direction, and scaling.
- Effect Controls: You can fine-tune transitions with blurring and distortion parameters.
- Smart Color Controls: You can match your transitions to your brand’s visual identity with color, contrast, saturation, and exposure.
- And a lot more!

Film Impact transitions help you create stunning videos that seamlessly captivate your audience. They are easy to use, versatile, and powerful! Simply said, with our transitions, you can unleash your creativity and make your videos unforgettable!
You did it!
You've now mastered the art of applying video transitions in Premiere Pro. For next steps, I highly recommend exploring the Film Impact video transitions, which are available for a 30-day free trial.
Unleash your creativity, enhance your storytelling, and captivate your audience with seamless and visually stunning transitions.
If you found this guide helpful, make sure to like and subscribe to our channel for more insightful tutorials. Thank you for joining us today, and we look forward to seeing you in the next one. Happy editing!
Plugins used
Product compatibility


